You’ve got a card?

Pineapple IIc 1.3.0. Copper and silk pattern may change in future version.
Congratulations!
You’ve got the latest version of Pineapple Computer named Pineapple IIc. But what is Pineapple Computer? Well, it is a MIDI computer that can covert analog signals to MIDI (digital) signal. Now you may want to ask, I guess, what is it for? The Pineapple Computer is an artist-friendly super-easy-to-use computer! You plug power, sensor, MIDI instrument, and boom! Everything is set up.
How to setup (Hardware)

Backside of Pineapple IIc 1.3.0.
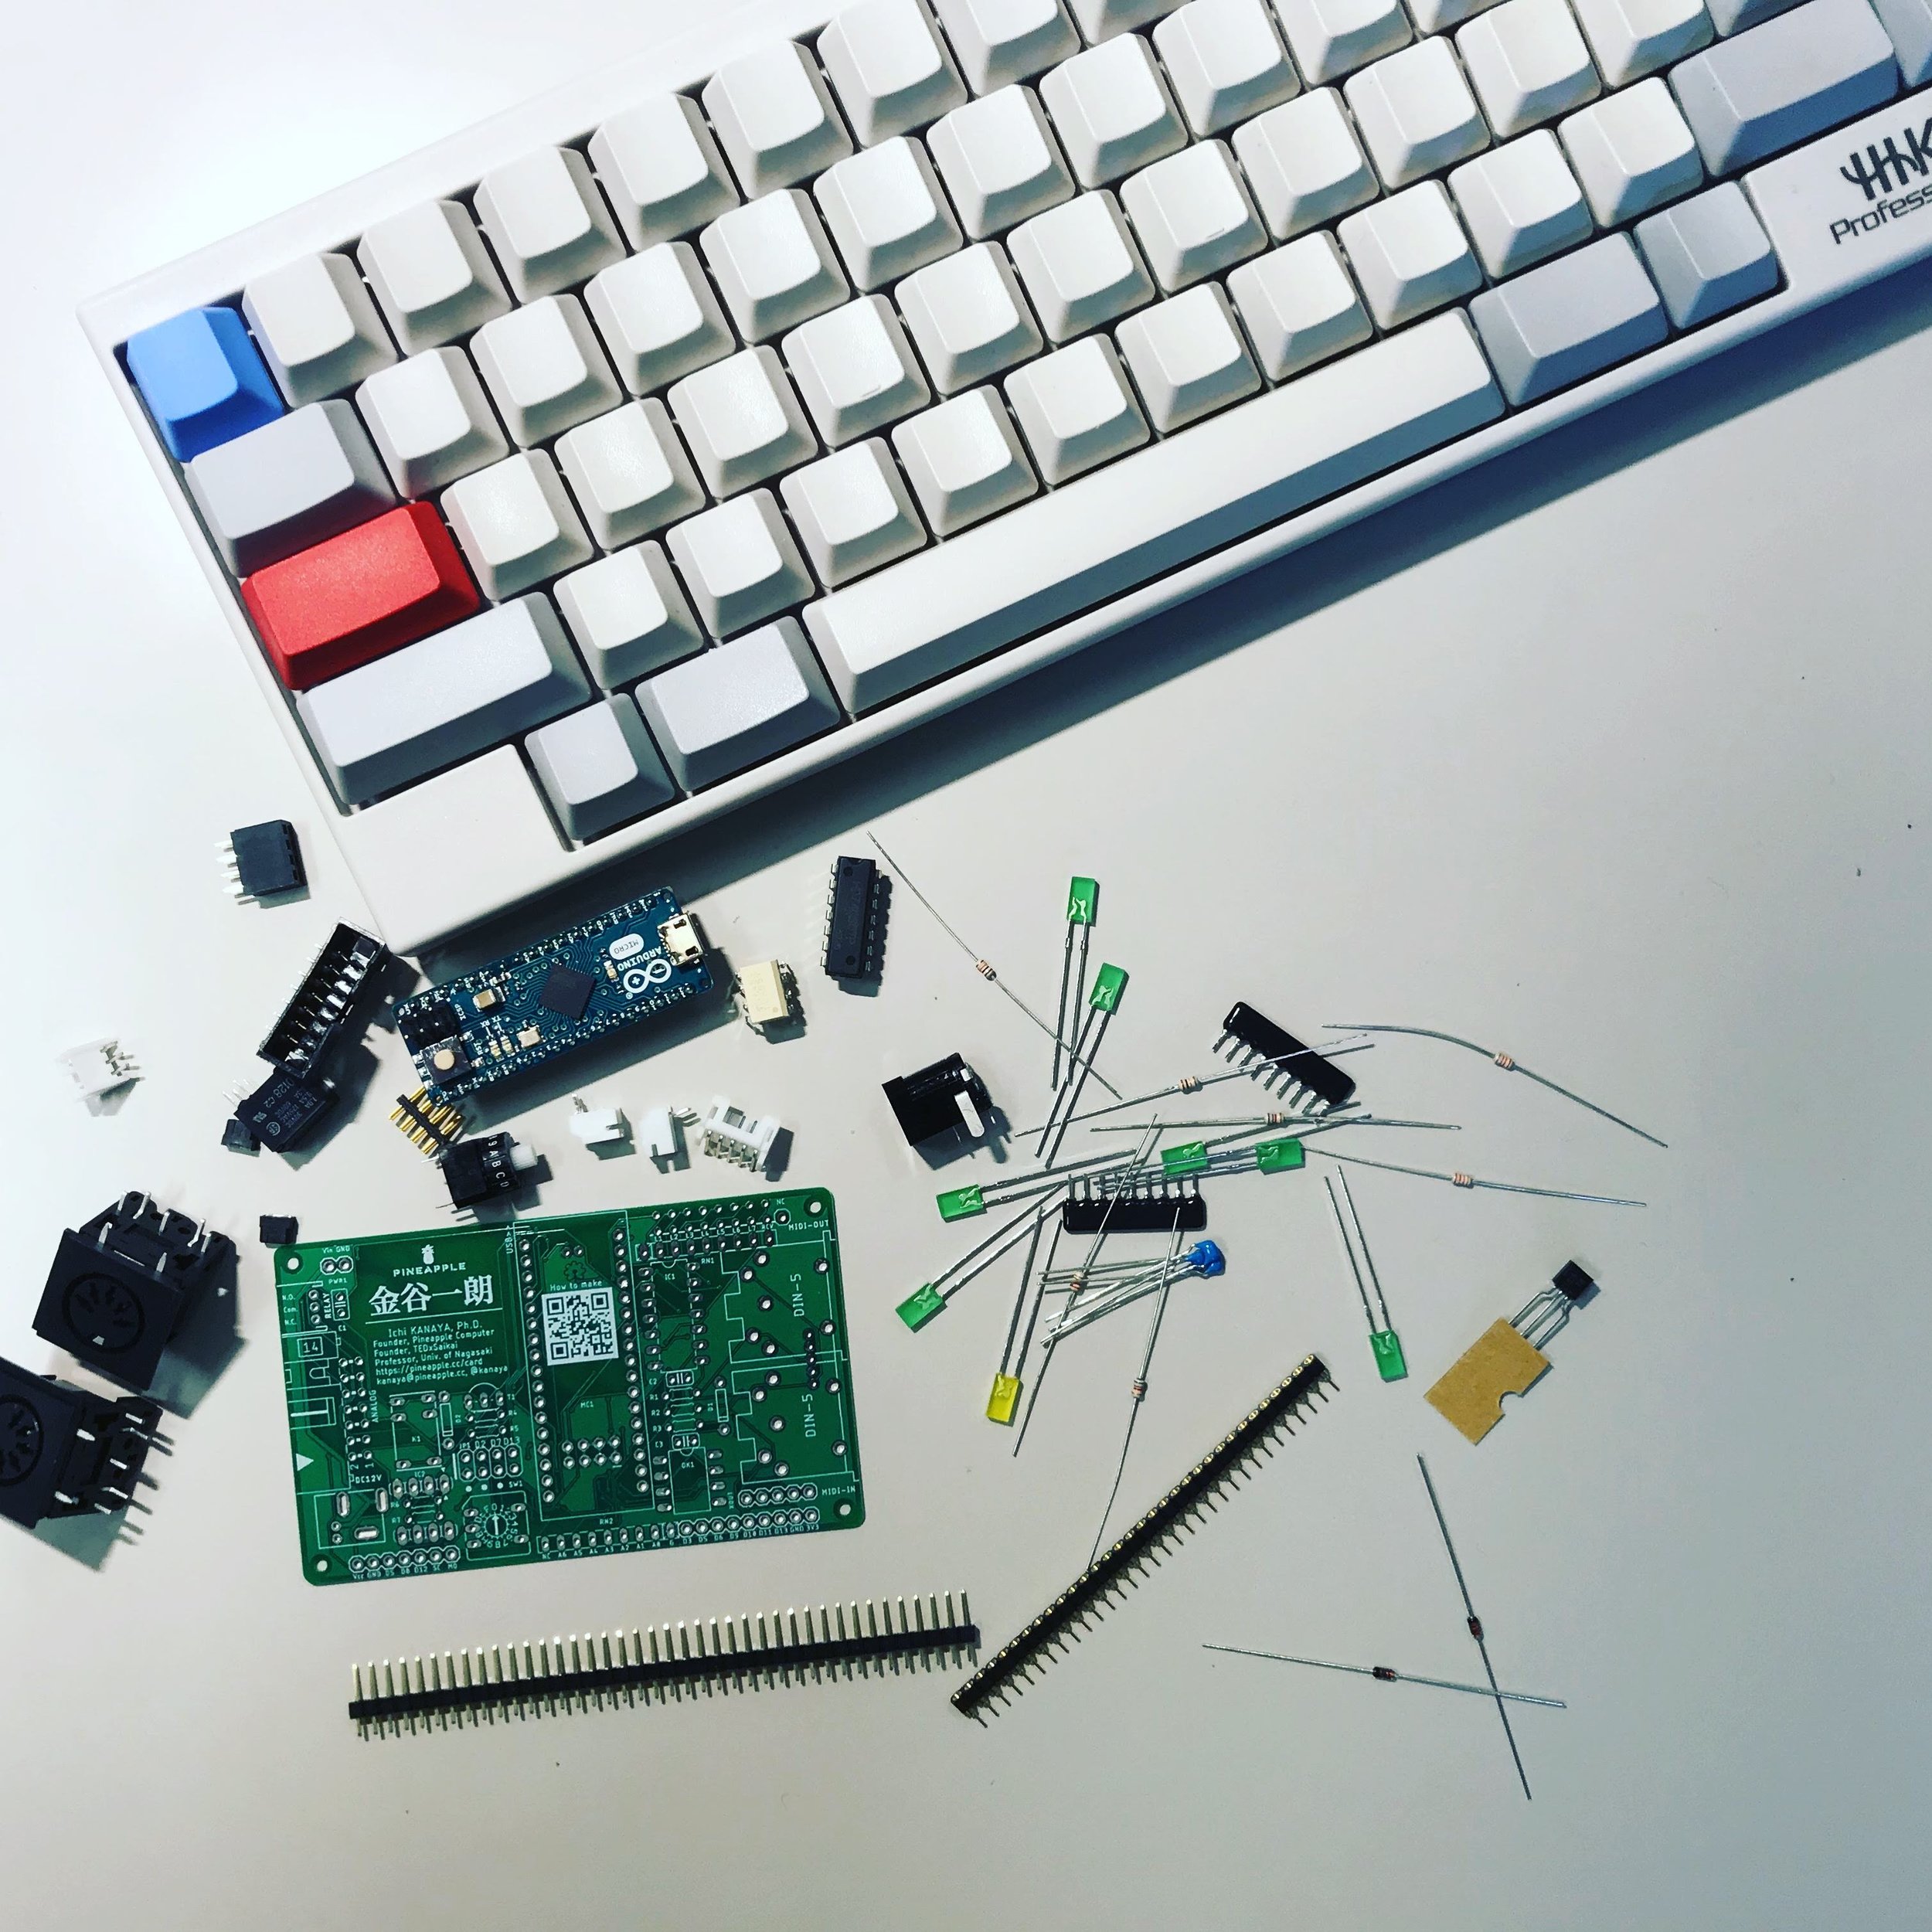
Install the following components.
MC1—Arduino Micro 5V
IC1—74LS07
OK1—TLP552
D1—1N4148
R1-3—220
R4—10k
RN1—330
RN2—10k
C1—0.1u
C2-3—0.01u
L1-7—Vf=2.2, If=20m, Green
L8 (labeled RCV)—Vf=2.2, If=20m, Red
SW1—HEX Complementary
JP1—Pinheader 2x4p, Bridge 1-2, 3-4, 5-6
Con. Analog—ML 14p, right angle (ML14L)
Con. DC—DC Jack
Con. MIDI—DIN 5p
How to setup (Software)
Download Pineapple IIc Basic sketch and transfer the sketch via Arduino IDE.
How to play
To be written.

Schematic of Pineapple IIc (prerelease version). Please find out the latest version at GitHub.
Shopping List
| Item | Name | Spec. | # | Online shops in Japan | Street Price as of 2018 (JPY) |
|---|---|---|---|---|---|
| MC | MC1 | Arduino Micro 5V | 1 | Switch Science, Amazon | |
| IC | IC1 | 74LS07 | 1 | Eleshop, Marutsu | 69 |
| Optocoupler | OK1 | TLP552 | 1 | Eleshop, Marutsu | 342 |
| Diode | D1 | 1N4148 | 1 | Eleshop, Marutsu | 102 for 10 units |
| Resistor | R1-3 | 220, 1/8W | 3 | Eleshop | 5 |
| Resistor | R4 | 10k, 1/8W | 1 | Eleshop | 5 |
| Resistor Net | RN1 | 8 elements, 330, 1/8W | 1 | Eleshop | 43 |
| Resistor Net | RN2 | 8 elements, 10k, 1/8W | 1 | Eleshop | 43 |
| Capacitor | C1 | 0.1u, 50V | 1 | Eleshop | 21 |
| Capacitor | C2-3 | 0.01u, 50V | 2 | Eleshop | 31 |
| LED | L1-7 | Green, If=20m | 7 | LED Paradise | 21 |
| LED | L8 | Yellow, If=20m | 1 | LED Paradise | 21 |
| SW. | SW1 | HEX. Comprementary | 1 | Eleshop, Marutsu | 411 |
| Con. | JP1 | Pinheader 2x4p | 2 | Eleshop | 133 |
| Con. | JP1 | Bridge 2p | 3 | Eleshop | 31 |
| Con. | Analog | ML14L | 1 | Eleshop, Marutsu | 118 |
| Con. | PWR12V | DC Jack | 1 | Eleshop, Marutsu | 53 |
| Con. | MIDI | DIN 5p receptacle | 2 | Eleshop, Akizuki | |
| Power | DC Power (12V1A) | 1 | Akizuki | 990 |
Extending Pineapple IIc
To use relay
Install the following components as well as Basic components.
| Item | Name | Spec. | # | Note |
|---|---|---|---|---|
| Transistor | T1 | 2SC1815 | 1 | |
| Diode | D2 | 1N4148 | 1 | |
| Resistor | R5-6 | 10k | 2 | |
| Relay | K1 | G5V-1 DC5V | 1 | |
| Con. | Relay | PH 3p | 1 |
Also you need to bridge 7-8 of JP1.
To use I2C
Install the following components as well as Basic components.
| Item | Name | Spec. | # | Note |
|---|---|---|---|---|
| Signal level converter | IC2 | PCA9517ADP | 1 | Put A-side up, B-side down. |
| Resistor | R7-8 | 6.8k | 2 | |
| Con. | I2C | SH 5p | 1 | D7 operates at 5V. |
You need to un-bridge 1-5, 2-6, 3-7 of JP1. (D2/SDA and D7 are connected to SW1, and D3PWM/SCL is connected to PWM0 via JP1.)
To use RST
Install the following components at back side as well as Basic components.
| Item | Name | Spec. | # | Note |
|---|---|---|---|---|
| Con. | RST (Back) | PH 2p | 1 |
To use LIGHTDRIVE
Install the following components as well as Basic components except for SW1. Since Arduino's D8 and D12 pins share SW1 connections and LIGHTDRIVE pins, you need to remove SW1.
| Item | Name | Spec. | # | Note |
|---|---|---|---|---|
| Con. | LIGHTDRIVE | Pinheader 7p | 1 |
The LIGHTDRIVE pinouts are:
| Lightdrive | Meaning | Arduino Pin |
|---|---|---|
| 1 | Vcc | |
| 2 | GND | |
| 3 | GSCLCK | D5PWM |
| 4 | BLANK | D8 |
| 5 | XLAT | D12 |
| 6 | SCLCK | SCLK |
| 7 | SIN | MOSI |
To use extra GND pins
Install the following components at back side as well as Basic components.
| Item | Name | Spec. | # | Note |
|---|---|---|---|---|
| Con. | GND (back) | Pinheader/socket 2x3p | 1 |
To use panel-mounted MIDI connector
Install the following components at back side as well as Basic components.
| Item | Name | Spec. | # | Note |
|---|---|---|---|---|
| Con. | MIDI (back) | PH 5p | 1 |
To use panel-mounted DC Jack
Install one of the following components as well as Basic components.
| Item | Name | Spec. | # | Note |
|---|---|---|---|---|
| Con. | PWR1 | Pinheader 2p | 1 | |
| Con. | PWR2 (back) | PH 2p | 1 |
To use XOUT
XOUT is designed for extra MIDI OUT capability. It is a direct output of Open Collector so that you may want to install 220-ohm resistor for use as MIDI OUT.
Install the following components as well as Basic components.
| Item | Name | Spec. | # | Note |
|---|---|---|---|---|
| Con. | XOUT | Pinheader 5p | 1 |
To use DIGITAL extension
You can hook L1-L7 driver pins by using DIGITAL pins. It also provides +3.3V DC.
Install the following components as well as Basic components.
| Item | Name | Spec. | # | Note |
|---|---|---|---|---|
| Con. | DIGITL | Pinheader 9p | 1 |
To stack multiple cards
To stack multiple cards, you can do one of the following options.
- Use spacer. Pineapple IIc has four M2 holes at each corners ((3, 3), (88, 3) (88, 52), (3, 52) mm).
- Use Pinheaders of Vcc (bottom left), 3V3 (bottom right), Pogo (top right), Vcc (top left) and perhaps GND (next to the Vcc at top left).

Mounting holes for Pineapple IIc 1.5.0-RELEASE and later.
Shopping List for Extending Pineapple IIc
| Item | Name | Spec. | # | Online shops in Japan | Street price as of 2018 (JPY) |
|---|---|---|---|---|---|
| Signal level converter | IC2 | PCA9517ADP Breakout | 1 | Switch Science | |
| Transistor | T1 | 2SC1815Y | 1 | Eleshop | 21 |
| Diode | D2 | 1N4148 | 1 | Eleshop, Marutsu | 102 for 10 units |
| Resistor | R5-6 | 10k, 1/8W | 2 | Eleshop | 5 |
| Resistor | R7-8 | 6.8k, 1/8W | 2 | Eleshop | |
| Relay | K1 | G5V-1 5V | 1 | Eleshop | 237 |
| Con. | Alt. MIDI | JST PH 5p | 1 | Eleshop | |
| Con. | DIGITAL | Pinheader 9p | 1 | Eleshop, Switch Science | 125 for 40p |
| Con. | GND | Pinheader/socket 2x4p | 1 | Eleshop | 51 |
| Con. | I2C | JST SH 5p | 1 | Marutsu | |
| Con. | LIGHTDRIVE | Pinheader 7p | 1 | Eleshop, Switch Science | |
| Con. | Pogo | Pinheader 1p | 1 | Eleshop, Switch Science | |
| Con. | PWR1 | Pinheader 2p | 1 | Eleshop, Switch Science | |
| Con. | Relay | JST PH 3p | 1 | Eleshop | |
| Con. | RST, PWR2 | JST PH 2p | 2 | Eleshop | |
| Con. | XOUT | Pinheader 5p | 1 | Eleshop, Switch Science | |
| Spacer | Raspberry Pi compatible (M2.6) | 1 | Switch Science |
Current: 1.5 Support branch
Latest release: 1.5.0-RELEASE